Four Days & Four Drawers Mini Organizing Challenge: DIY Kitchen Utensil Drawer Dividers
Before and After Budget Friendly Cabinets/Drawers/Closets Kitchen Our Projects/DIY Storage SolutionsWelcome to the end of Four Days & Four Drawers week. This week I was dedicated to accomplish four organized drawers within four days, and once again, I am sliding in just under the mini-challenge wire. The cool thing is I almost accomplished six drawers in four days. The not-so-cool thing is that when I was complete with the DIY portion of two of those drawers, I wasn't 100% satisfied with my work. So although I am not quite ready to share the final two drawers yet, fingers crossed I will get those finished up this weekend.

But today is not about what I didn't get done, and all about celebrating what I did accomplish. The final two drawers this week were both kitchen messes that I have been meaning to deal with for quite awhile now. Next to our range we have two drawers that are dedicated to our cooking utensils and kitchen gadgets. We have never been ones to keep an abundance of random kitchen tools on hand, but we do have a few favorites that we find quite beneficial to our daily cooking and meal preparation.
When we unpacked our kitchen boxes, we did it quickly to clear our guest room for visitors. Everything was tossed into the specific cabinets and drawers as planned, yet not in any organized fashion. Although the drawers and cabinets are not extremely messy, they definitely need a little love and attention.
The top drawer holds our spatulas, slotted spoons, pastry brush, can opener, masher and salad tongs, as well as our herb chopper and pizza slicer.

I had started trying to organize the next drawer down with some organizers I picked up at the Container Store awhile back, but I wasn't 100% happy with the result.

After looking for a few options that would fit our spatulas and drawer measurements, I found myself coming up short. And when I can't find exactly what I am looking for, I turn directly to DIY options.
We have created wooden drawer dividers in the past, but with all of the odd shapes and cuts for our kitchen tools, we decided that we needed an easier solution than the one we used previously.

For the dividers themselves, I picked up a five pieces of 3" oak hobby boards from Home Depot. After I added a few of our unused tools to our donate box, I arranged the remaining items in the drawer.

Then we just measured and cut each drawer piece one at a time (straight and simple cuts). We placed them into the drawer at the approximate location that fit our layout and worked our way from front to back.

While each of the divider pieces were in their planned location, we used a pencil to mark each board to keep track of our template/layout.

After everything was measured and temped out inside of the drawer, it was time to make them stick. We didn't want to do anything permanent to our new drawers, so we had to find a way to affix them together while keeping them removable as well. I considered using wood glue and small nails or staples, but I didn't want the visual messiness of those options. I found this tutorial and decided our best bet was to go with construction adhesive.

It is important to select an adhesive that will dry clear/transparent because the glue is placed along each divider seam.
Prior to gluing, we placed down a layer of parchment paper to protect our drawer.

We then put our drawer dividers back together based on our pencil markings, using the drawer as a guide to hold all of the pieces together while they dried.

We first placed glue on the edge of each board with our finger. When the board was pressed against another board, the glue would squirt out through the seams. I used a cotton swab to clean up any drips or chunks and occasionally also added in a bit more glue to be sure everything was going to dry solid. Above you can see the adhesive initially comes out white, but below you can see it clearing up as it dries.

Once the dividers were dry (I waited a couple of hours), I removed them from the drawer so that I could line the drawer with true drawer liner (the same liner I used for our pantry and our essential drawer).

Although I typically use anything from cardstock to gift wrap when it comes to lining drawers, this stuff is the "real deal" and has held up quite well in the other kitchen drawers. Plus, I appreciate keeping the lining consistent throughout the entire kitchen space.
Top drawer done and filled:

And the next drawer down also completed and filled:

Prior to this drawer project we had already purged the majority of our utensils and tools down to our very favorites, however, I did go ahead and purchase a new set of matching measuring spoons since we only had a few miscellaneous sizes of previous sets remaining (which also ended up in the donate box). Above you may have also noticed that we had a spatula that was slightly too long to be placed in our drawer sideways, but being that it is made of wood, we were able to easily take a small portion off of the handle to make it fit where we wanted. #victory

The entire cost of the project came down to the pieces of hobby wood and some glue. To achieve beautiful wooden dividers that fit our exact tools and needs, I think it was $20 and time well spent.


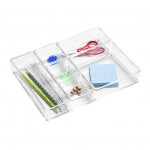
As much as I love (LOVE) acrylic dividers, I also appreciate trying something new. By mixing things up from our "go to" option, I was able to maximize how we utilize the drawers and create a clean look with wood that blends in seamlessly with the drawers. Double win.

Have a great weekend everyone and cheers organizing our homes one fabulous drawer at a time!
But today is not about what I didn't get done, and all about celebrating what I did accomplish. The final two drawers this week were both kitchen messes that I have been meaning to deal with for quite awhile now. Next to our range we have two drawers that are dedicated to our cooking utensils and kitchen gadgets. We have never been ones to keep an abundance of random kitchen tools on hand, but we do have a few favorites that we find quite beneficial to our daily cooking and meal preparation.
When we unpacked our kitchen boxes, we did it quickly to clear our guest room for visitors. Everything was tossed into the specific cabinets and drawers as planned, yet not in any organized fashion. Although the drawers and cabinets are not extremely messy, they definitely need a little love and attention.
The top drawer holds our spatulas, slotted spoons, pastry brush, can opener, masher and salad tongs, as well as our herb chopper and pizza slicer.
I had started trying to organize the next drawer down with some organizers I picked up at the Container Store awhile back, but I wasn't 100% happy with the result.
After looking for a few options that would fit our spatulas and drawer measurements, I found myself coming up short. And when I can't find exactly what I am looking for, I turn directly to DIY options.
We have created wooden drawer dividers in the past, but with all of the odd shapes and cuts for our kitchen tools, we decided that we needed an easier solution than the one we used previously.
For the dividers themselves, I picked up a five pieces of 3" oak hobby boards from Home Depot. After I added a few of our unused tools to our donate box, I arranged the remaining items in the drawer.
Then we just measured and cut each drawer piece one at a time (straight and simple cuts). We placed them into the drawer at the approximate location that fit our layout and worked our way from front to back.
While each of the divider pieces were in their planned location, we used a pencil to mark each board to keep track of our template/layout.
After everything was measured and temped out inside of the drawer, it was time to make them stick. We didn't want to do anything permanent to our new drawers, so we had to find a way to affix them together while keeping them removable as well. I considered using wood glue and small nails or staples, but I didn't want the visual messiness of those options. I found this tutorial and decided our best bet was to go with construction adhesive.
It is important to select an adhesive that will dry clear/transparent because the glue is placed along each divider seam.
Prior to gluing, we placed down a layer of parchment paper to protect our drawer.
We then put our drawer dividers back together based on our pencil markings, using the drawer as a guide to hold all of the pieces together while they dried.
We first placed glue on the edge of each board with our finger. When the board was pressed against another board, the glue would squirt out through the seams. I used a cotton swab to clean up any drips or chunks and occasionally also added in a bit more glue to be sure everything was going to dry solid. Above you can see the adhesive initially comes out white, but below you can see it clearing up as it dries.
Once the dividers were dry (I waited a couple of hours), I removed them from the drawer so that I could line the drawer with true drawer liner (the same liner I used for our pantry and our essential drawer).
Although I typically use anything from cardstock to gift wrap when it comes to lining drawers, this stuff is the "real deal" and has held up quite well in the other kitchen drawers. Plus, I appreciate keeping the lining consistent throughout the entire kitchen space.
Top drawer done and filled:
And the next drawer down also completed and filled:
Prior to this drawer project we had already purged the majority of our utensils and tools down to our very favorites, however, I did go ahead and purchase a new set of matching measuring spoons since we only had a few miscellaneous sizes of previous sets remaining (which also ended up in the donate box). Above you may have also noticed that we had a spatula that was slightly too long to be placed in our drawer sideways, but being that it is made of wood, we were able to easily take a small portion off of the handle to make it fit where we wanted. #victory
The entire cost of the project came down to the pieces of hobby wood and some glue. To achieve beautiful wooden dividers that fit our exact tools and needs, I think it was $20 and time well spent.
As much as I love (LOVE) acrylic dividers, I also appreciate trying something new. By mixing things up from our "go to" option, I was able to maximize how we utilize the drawers and create a clean look with wood that blends in seamlessly with the drawers. Double win.
Have a great weekend everyone and cheers organizing our homes one fabulous drawer at a time!
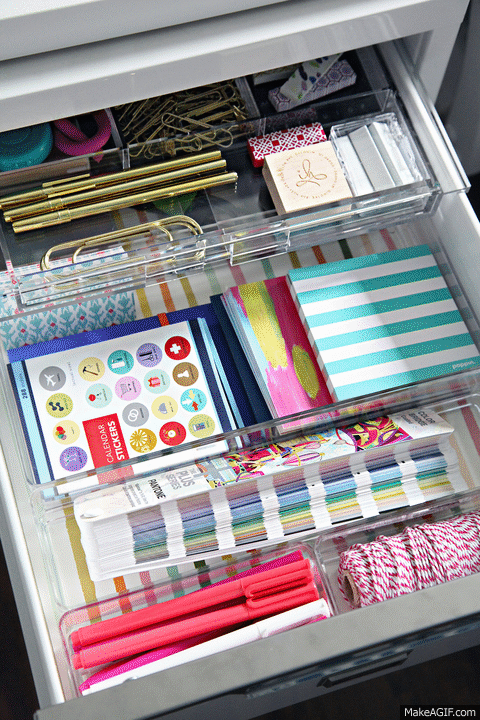
** Catch up on the remainder of the mini series with our home office drawer here and our school supply drawer here. **