Showing posts with label Art. Show all posts

Sunday, January 3, 2016

How to paint Abstracts with Skye Taylor


A lot of artists are afraid of using acrylics especially after they have worked a lot in oils or watercolors. But they can be an essential part of an artist's portfolio and here I will give you 11 tips to help you make the most of them.
You can use acrylic paints both like oil paints (taking into account drying time) and like watercolours by watering down the paint so they are hugely versatile. They just take a bit of getting used to. You can create realistic paintings and I personally think they are great for creating abstract art. You can be big and bold with your colours or you can be subtle and detailed.
Below are some of the things that I think are essential or just useful to know about acrylic paints:


  1. Firstly, although acrylic paint is water soluble when wet, once it is dry it is like plastic. Therefore you must make sure you wash your brushes or painting implements immediately after use and before the paint dries or else you may ruin your art tools, particularly brushes.
  2. If you are used to using oil paint and find that acrylic paint dries too quickly, then there are products out there that will stop the acrylics from drying so fast. Buy some good acrylic paint retarder and that will really help you if you want to use acrylics for wet into wet for example.
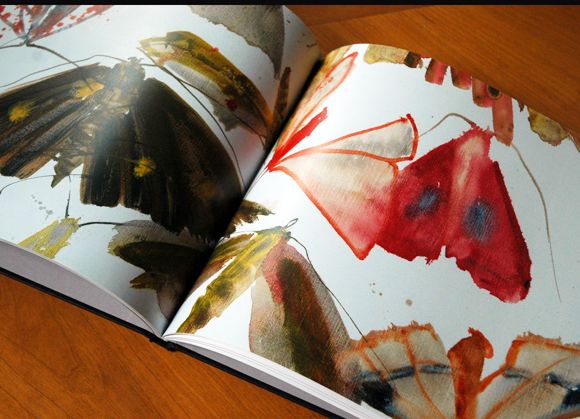
  3. You can get some really interesting effects by watering down the acrylic paint when you use it. Try using the paint as if you were painting a watercolour scene or use for abstract work like 'marbled' style paintings.
  4. Make use of the properties of acrylic paints by using layers of paint on top of each other once each layer has dried. The paint will not mix into each other and make a muddy mess as can sometimes happen with oils.
  5. Also make use of the fact that acrylic paint dries quickly by adding a heavy varnish to the painting. A good gloss varnish will really brighten up the colours and, unlike oils where you have to wait months for the paint to dry, you can varnish the painting almost immediately therefore protecting it from dirt and damage.
  6. Use acrylic paint as a base for your oil paintings - this means you can work on the much more quickly than having to wait for a layer of oil paint to dry. But note that you can't put acrylics on top of oils.
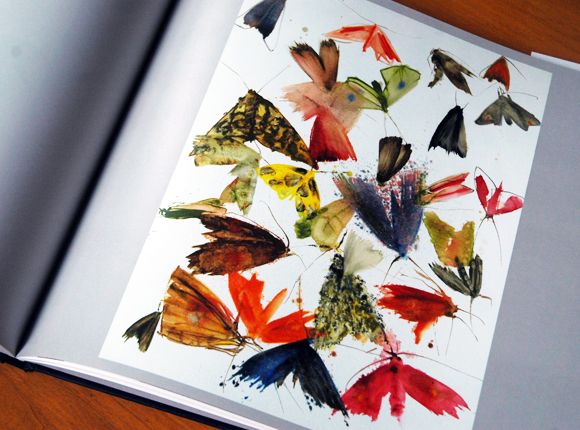
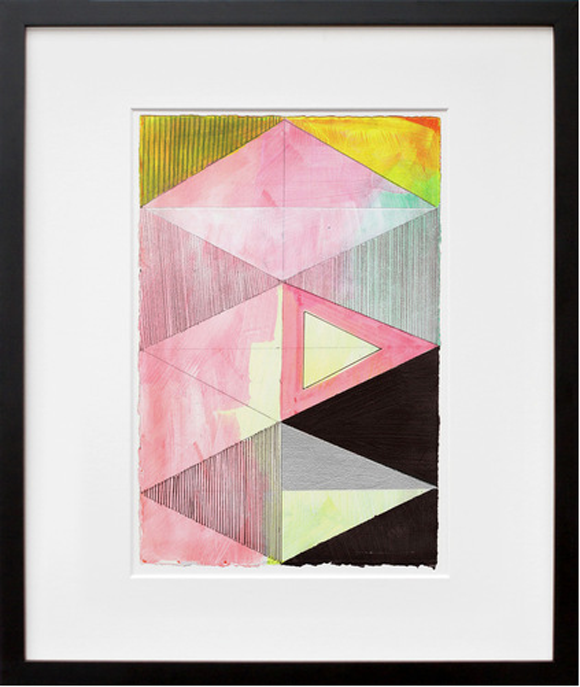
  7. Acrylics come in some really great colours including fluorescent green, orange, pink and yellow so experiment and have fun with them!
  8. You can also use acrylic paint to decorate clothes if you wish and the paint will not come out in the wash. Therefore do not spill acrylic paint on your clothes by mistake if you can help it. Always wear an apron or old clothes when painting. Any spillages should also be cleaned up before the paint has a chance to dry.
  9. If you can't get the top off a bottle of acrylic paint then wear rubber gloves and that should solve the problem.
  10. Keep any leftover paint and store it all in a plastic bottle so that you can use it in future for under-painting or creating some extra texture under a painting.
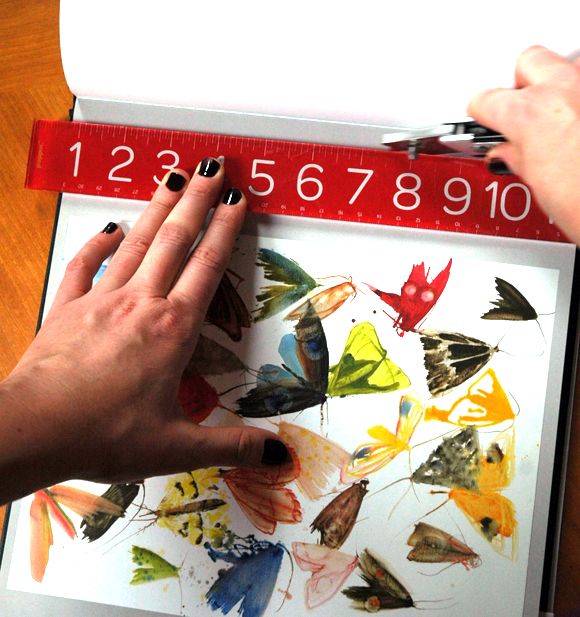
  11. There are any number of implements that you can use to apply acrylic. Go to your local hardware or DIY store and pick up some scrapers with different shapes and teeth to add texture. You can also use tools to scrape out parts of the paint once you have applied it.
So, acrylics are very flexible but it does take a while to get used to their properties. Keep trying different things out and practising different techniques and you will soon be enjoying painting with acrylics.
If you want more info on using acrylic paints then check out my step-by-step guide to creating an abstract painting with acrylic paint.
 source


Tuesday, October 13, 2015

Thursday, September 24, 2015

Art + Interiors: Black and White Optical Illusions [Bridget Riley]

Hello! I hope you all had a lovely holiday and are keeping warm, I apologize for the lull in posts this week but I'm getting my booty back in gear now. I realize my posts lately have been heavy on the color so I thought I'd do a throw back to the classic black and white palette but of course with a major twist. Enter Bridget Riley...
The English artist was iconic in the 1960's with the Op Art movement, a body of work which sought to trick the eye of the viewer causing optical illusions. The movement produced works of art that pulled you in then seemed to vibrate right in front of you. Riley's works in particular show a great deal of meticulous restriction in line and color letting the eye of the viewer fill in the blanks.
And I was especially smitten with the photographs of Riley in her studio which make me nostalgic for my days as an Art Major at the University of Washington where I would spend hours in the print studio loosing track of time. Riley's work speaks to immersing quality of art and shows us that black and white doesn't have to be boring at all...

Rug Madeline Weinrib, Scuplture Chiasso, Pillow etsy BeStillShop, end table Arteriors Home, Art Chiasso, pillow Sachin and babi, Coffee table Jayson Home and Garden, Ottoman/tile Sparrow and Co., Sofa Room and Board


"The eye can travel over the surface in a way parallel to the way it moves over nature. It should feel caressed and soothed, experience frictions and ruptures, glide and drift. One moment, there will be nothing to look at and the next second the canvas seems to refill, to be crowded with visual events" -Bridget Riley 

And a few quirky black and white interiors for you...Enjoy!!
image via ArhZine

image via art-deco-interior.blogspot.com


Monday, February 25, 2013

Swan Prints

Our bedroom is starting to come together. I guess really all I have left is to figure out a headboard (that's why we have an extra row of pillows stacked on our bed - something soft to rest our backs on for the time being!) and maybe a little art project for the long wall to the right here. There's also a chair on the other side of the room that could probably use new upholstery. But for now we're enjoying our recently purchased bedside chests, lamps and rug (on super-sale!). The DIY roman shades are working beautifully (still enamored with the tumbling block tape trim!) and the art has been hung. I'm happy with both the vintage oil painting on the window side of the bed and the swan print on the right side:
   
Remember this post? I ended up buying the swan print thinking it was going to make it up in the gallery wall in our living room, but somehow it fit our bedroom vibe better. It's a little funny how much I love swan photography because I'm actually not the hugest fan of birds in real life (I swear the pigeons can sense my distain and they seek me out). But swans! Aren't they just hauntingly beautiful? And I think they photograph so well, sort of in the same way horses do.

I layered the swan print with a small abstract pastel (that looks so blah here in these photos - promise it's a great little piece in person). I bought it at the flea market a couple years ago and completely forgot about it. When I was looking in the basement for a frame for the swan, it resurfaced, and I think the two pieces were meant to be paired. I like how they work together in the space since I wanted a contained amount of color in here (this green Brunschwig wallpaper and bright blue door are in the hall just outside our room).


Here are a few other swan prints that I'm loving, in case you're in the market yourself:

Patrick Cline used to sell these polaroid prints in an etsy shop, but the shop was taken down recently. (Might be worth reaching out to him to see if he has any of the limited edition prints left?)


If Patrick doesn't, this print is sort of cool, too (and is super affordable).


This $10 print is simple and juvenile in the best way possible.

How was your weekend? It felt a little like spring yesterday here in New York. Everyone was out walking their dogs and playing with their kids, and smiling and brunching and buying flowers. The general enthusiasm on the street was pretty contagious and it made me suddenly remember how much we really do like living here. (side eye over to you, Winter.)

Monday, February 11, 2013

Moth Prints

Pssst - Thank you again for your support with the Homies! We made it to the final round in two categories (hooray!) and the voting has started over again. If you have a minute to pop over and vote for LGN as best home design blog and/or best DIY blog, it would mean the world to me. Thank you so, so much! xo

Years ago, Anna Spiro wrote about the Australian artist Allyson Reynolds and her beautiful paintings of colorful moths. Pretty much everyone went bonkers for them and the large paintings were completely unattainable. I've since heard one of the galleries there in Australia occasionally has one or two up for sale (in case you're in the market).


Recently I happened to stumble across her book called Moth Song that the artist sells through Blurb.


It's pricey at almost $100 with shipping and taxes, etc, but there are pages and pages of beautiful images that I think are completely frame-worthy.


About half the book is moths and half is this series of black and white images. I love these too and hope to use them somewhere. The patterns are all different and would look so pretty in a series in a hallway or maybe a powder bath?


There are probably a dozen or more moths prints in the book and I knew I wanted to use four in Heather's room. I just used a utility knife and a ruler to carefully cut out the pages I wanted. 


This way, the book is still (mostly) in tact and the other pages can still be enjoyed without it being obvious that a few were torn out.


I picked up my trusty two-pack of frames at Michaels for about $7 and a couple of simple white mats to frame the four "prints".


They're not fancy frames obviously, but I really love how simple the white on white look is with all the crazy colors and the movement in the prints.


Heather loves the prints as much as I do. Aren't all those bright colors pretty on the dark green walls?


And I also like how they pair with the new (super affordable) wall-mount sconces I bought at Urban Outfitters. I decided to paint out the white cords with the wall color paint, just so everything not meant to be noticed sort of fades into the background of the wall (along with the corbel nightstands and the light switch plate).


Now I just need to pick a fabric for her shams so I can photograph the rest of the room.  I am dying to show you the giant art just to the right of this shot above! (eeps! so excited!)

Tuesday, January 8, 2013

Hanging Guitars


Thank you all for your kind words about the bookshelves! Some of you commented on how lucky we were that the Billys fit perfectly in the bump outs that flank the fireplace. The true story is neither side was a perfect fit. On the right side, we had to cut off two inches of the outer most bookshelf, so that a pair would fit in that nook.


And then the bump out to to left of the fireplace was too big for a pair to fit snuggly. There was about about 16" of leftover space that I wasn't quite sure what to do with. I didn't want to add more shelves because of the opening to the kitchen. Luckily, it was right around Michael's birthday when we were trying to figure this all out. One of his presents was a vintage ukelele I ordered off eBay and when it arrived I thought the wood grain was so pretty that it was a shame to hide it. ((lightbulb!!)) So I grabbed a couple guitar hooks and a small one made for ukeleles at the music shop down the street, and while Michael was at work I installed the guitars on the wall in the nook space. His guitar, acoustic bass and the new ukelele fit perfectly, one on top of the other.


I told the girls to not say anything to Michael when he came home so that he would sort of stumble on the hanging guitars and it would be a great surprise. But of couse they pointed him right to the guitars, wildly giggling, as soon as he walked in the door. Kids are so awesome at keeping secrets.


Michael is a really talented musician and I love having instruments around the house so he can keep up with his playing. This hook-hanging solution has been perfect because the guitars are protected, but they're still easily accessible.


I also love how the three different depths here (the wall, bookshelf and fireplace) are outlined by the dentil moulding. I'm telling you, just putting up those 5.75 measly inches of cheapy crown moulding completely transformed this room. My mom and I both agreed that suddenly it felt like the house was an old brownstone and not a bad condo from the 70s. I'm dying to do the baseboards now and maybe some paneling like we talked about before. Also, I promise there's a crown moulding tutorial coming soon. There was a bit of a learning curve for me in this first room, but now I'm tackling the garden level and I feel like I have some good pointers to share.


So, I'm really curious. If you have instruments, where do you keep them? I play the violin, and I'd love to have it out so that I would practice more, but the case is really bulky and it stays in my closet for now. If we ever have a big house someday, I'd take a music room over a media room in a heartbeat.

PS A hanging guitar in Alex and Joanna's bedroom.

Monday, December 10, 2012

Pairing Prints

After a decade of being a couple, Michael knows by now that I will always ask for art when it comes to gift-giving holidays. I love having that memory associated with something hanging on my wall. :)  This Christmas, I'm hoping for either this print, which reminds me so much of the mountains in Arizona, where I spent my summers growing up. Such a unique and beautiful place.


I also LOVE this one. I have a small collection started of black and white abstracts and this limited edition print would be a great addition I think.


If you're looking to make a memory with a loved one and give the gift of art, 20x200 has offered LGN readers $10 off purchases over $50 using the code LITTLEGREEN, good through the 17th. They have the coolest gift guides up on their site right now, organized by personality traits: Geeky, Animal-lover, City-Dweller, Wanderer, etc. It was really easy to navigate through all of the great art using the categories! When I had all my picks together, I found myself pairing together complimentary prints.

Wouldn't these two look great next to each other? I'd give these to my little sister who recently graduated from college.


here

And how about these two for my other sister? In the gift note, I would passive-aggressively suggest that she should hang them stacked vertically in her super-chic lavender gray powder bath. :) I love the way the colors work together!


here

How about these for my single girlfriend who has is decorating a fly bachelorette pad?


here

These two are done by the same artist, so it's no wonder they look so pretty together. I'm sure I could figure out someone to give them to, but I wouldn't mind snagging the pair for myself.


My friend's young kids have an encyclopedic knowledge Star Wars (it's hilariously adorable) and I know they'd love both of these hanging in their play room.


here


I would love these two aerial shots for my girls' room. Weren't these just meant to be hung together?!


Check out the 20x200 Gift Guides for so many more great pieces. And don't forget about that $10 off deal! 


PS Which of these do you think your friends/family would click first if they were shopping for you? I think Michael would choose the Wanderers gallery for me. Or maybe Shiny Happy People? Maybe someday I might be cool enough that someone chooses Gallery Hopper for me. :)